Be aware that some of these mechanics may be particularly advanced, and
requires knowledge from other pages to understand. The majority of
information here does not really matter on normal runs as sets
are essentially random anyways.
Information on the sheet is based on whoever is willing to volunteer
information about their runs. Screenshots can be shared in the
NT Discord via the dailies and
weeklies channel, where a sheet editor can add the information in.
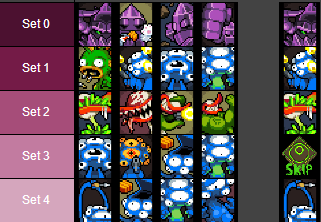
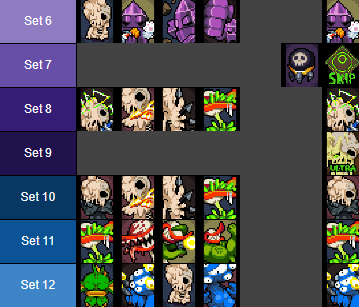
The following image is a sample sheet of what the daily scouting sheet
looks like. Everything can be categorized through the row numbering on
the far left;
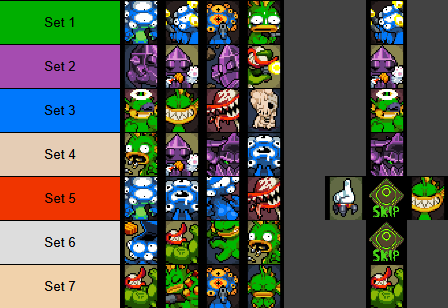
There are also multiple tabs on the bottom. Typically seen are the sheets
for the current Daily and Weekly sets, and a guide tab
which is a shortened version of this page.
Scouting information is mainly shared for update 100 for Steam. Set information for
previous versions as well as Switch, PlayStation and Vita see sparse activity
thus are not tracked.
Everything listed here is as it appears on the sheet with an in-depth
explanation. More relevant mechanics will be closer to the top.
Particularly niche mechanics will be listed near the bottom. These ones
rarely come up in runs unless if done on purpose. Most of Skeleton's
set mechanics are on a separate
page as these are absurdly uncommon.
Non-Set Mechanics
|
|
Current Daily
|
- Displays the current daily in year-month-day format.
-
The date needs to be manually updated by a sheet editor. Current
date is UTC based to reflect current daily.
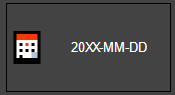
-
If it is the wrong date it will automatically update to have a
red background. This is a signifier the daily sheet is still
from a previous day.
-
The calendars themselves are their in-game sprites with red for
dailies and blue for weeklies.
|
Wrong Daily
|
| Note for Drops |
All weapon drops/chests have multiple factors that are all
explained in full detail here. If
the following cells for Pizza/Meta Weapons/Cursed Chests do not make
sense, refer to that page.
|
|
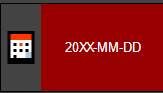
Pizza Entrance

|
-
The manhole cell is used to signify if there is access to
preloop Pizza Sewers.
-
The purpose of this is to increase difficulty and a few extra
rads, which can sometimes be the difference for an extra level
up by 3-2 for Destiny strats.
-
Grenade Launcher starts appearing on 1-1, while the 2-1 chest
has Toxic Launcher or Bazooka in its pool.
-
Example: The cell suggests to check big chests
which means that there were no explosive weapons seen. Whoever plays next
can skip weapon chests to see what appears in the 1-3 or 2-1 big chests, if either
appears.
|
 |
|
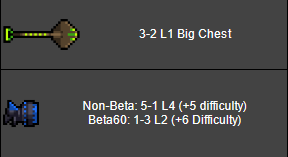
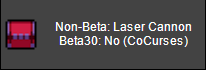
Meta Weapon Drops
  
|
-
Weapon cells are used to indicate where meta weapons drop.
-
Ultra Shovel is for normal meta, Ultra Crossbow for ranged meta,
and SPC for both.
-
Example: The cell for Ultra Shovel shows that
it's inside a big chest on 3-2 L1, which is the same regardless
of FPS. Skipping four weapon chests can guarantee this to
spawn.
-
The cell for SPC lists that it is a weapon drop on 60 FPS on 1-1 L1,
meaning that it may not appear for 30 FPS runs. It has +3 Difficulty
meaning that the runner visited Pizza Sewers and two Crown Vaults during
preloop.
|
|
|
Cursed Chest

|
-
The cursed chest cell is used to signify if there is access to
Cursed Crystal Caves in preloop.
-
This is done for extra rads which can occasionally come in use
for preloop Jungle (if Last Wish is in a later set), or a high
level destiny.
-
If the cell does not specify crown used on the daily sheet,
assume that Crown of Curses was taken for 3-3.
-
Example: The cell specifies that on 30 FPS there's a cursed
Toxic Launcher on 3-3, which by default uses Crown of Curses.
-
For 60 FPS it specifies no while running Crown of Curses, although it can technically still appear
while running another crown.
|
 |
|
Vaults
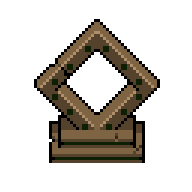
|
-
The Vault cell signifies its locations on 3-2 and 5-2 during
preloop, for the sake of making Destiny
radstarving easier.
-
This cell is infrequently filled out, but sees usage on dailies
with particularly awful Vault locations or on a perfect meta
daily.
-
1-2 L1 is usually an open area with a high enemy count and is
rarely mentioned.
-
Extra information is sometimes included, such as if there is
particularly few enemies or if reaching a certain level in time
is barely possible.
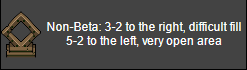
- Location of the Vault depends on FPS used.
-
Example: The cell specifies for 30 FPS runs the 3-2 layout is to the right side
of the level with a difficult fill, meaning that the player may need to rush there to make it possible.
-
For 5-2 it mentions it's straight up from spawn and an open area, meaning it's easy to fill the Vault
but collecting rads on accident could easily happen.
|
 |
Common Set Mechanics
|
|
Patience

|
- Patience will reroll the current set.
-
The new set will be given upon finishing the following level.
-
Patience can only be taken once per run. It will be removed from
the mutation pool once selected.
-
The mutations given is a separate set entirely, and is listed at the bottom of the sheet.
- Patience will always give the same set regardless of when it is taken that run.
- For suggested/scout routes, the mutation from Patience will be listed directly to the side.
Example: The scout took Patience in Set 3 which gave them Trigger Fingers, which they
listed directly to the side.
|
 |
|
Level Ultra

|
- Used to signify when ultra is taken in a route, as an indicator
on when the scout's route ends.
|
|
Last Wish

|
- Last Wish will serve as a delayed reroll.
-
The new set will be given upon entering Jungle, which can be
done on 5-1 regardless of loop.
-
Once Last Wish is consumed the mutation will be removed from the
player and re-enter the mutation pool, meaning that Jungle can
be visited multiple times in a run.
- Like Patience, every Jungle set is a unique set listed below all the normal ones.
- Every additional Jungle progresses the unique sets by 1. Jungle 1, Jungle 2, Jungle 3, so on.
- Example: The scout takes Last Wish in set 3. After set 6 they enter Jungle, which gives them Rhino Skin in the Jungle 1 set.
- They then take Last Wish again in set 7, and then in Loop 1 they get Plutonium Hunger from the Jungle 2 set.
- (Sometimes scouts will list their Jungle mutation directly next to Last Wish, but in this example it's easier to understand set order.)
|
 |
|
Vault Skipping

|
-
Stepping on a crown pedestal directly will cause the next set to
be skipped.
-
As three Crown Vaults can be visited in a run, this means that
up to three sets can be skipped.
-
Awakening the Crown Guardians first instead of stepping on the
pedestal will result in no vault skipping happening.
-
In other words, a set is only skipped if the crown selection
screen is seen.
- Jungle is not affected by vault skipping.
-
Patience is normally not affected by vault skipping.
-
The exception is if Patience is taken when entering a vault,
the Patience set will be skipped and will simply show the
next normal set in its place.
-
Example: After reaching level 4 (giving set 3) the crown pedestal is stepped on,
skipping a set.
- Upon reaching level 5, set 5 will now be given.
|
|
|
Destiny

|
-
Crown of Destiny grants one
extra mutation upon taking the crown (dailies), or upon
finishing 1-1 with Destiny start (weeklies).
-
Only one mutation is seen for all the following sets including
ultra. Downside can be avoided by swapping off the crown.
-
The mutation given is a unique set similar to Patience and Jungle. Additional level ups
will simply give normal sets.
-
Avoiding leveling up between 3-2 and 5-2, or between 5-2 and 1-2
L1 is called
radstarving.
-
Last Wish will never appear while running Crown of Destiny,
unless if playing specifically as Horror.
- Horror can see two mutation/ultra slots per level up.
-
Bug: If leveling up while in a Vault and Crown
of Destiny is removed, it will erase the following set.
- Example: After reaching level 5 (set 4), Crown of Destiny is taken in the 3-2 Vault which gives the Sharp Teeth mutation.
- As a vault was visited this causes a vault skip.
- This route then radstarves until 5-2, taking Crown of Destiny off in the next vault which skips another set. Reaching level 6 will then give set 7.
|
|
| Set Ordering |
-
If multiple sets are seen at a time then the Jungle set will always be seen first,
then the Patience set, and then any normal sets.
-
The unique Destiny set comes before normal sets. Destiny set
would never interact with Jungle, nor for Patience as explained
above.
|
Uncommon Set Mechanics
|
|
Loop Starve

|
-
Used to signify when Crown of Destiny should be taken on 5-2,
and then taken off on 1-2 L1.
-
Radstarving is more difficult for these areas, so it's only
usually done for especially good dailies or if playing as
Horror.
-
Example: After reaching level 7 (set 6), Crown of Destiny is taken
in the 5-2 Vault in order to skip set 7, giving Sharp Teeth.
- Leveling up is done once between the 5-2 and 1-2 L1 Vaults, which gives Long Arms.
- At the 1-2 L1 Vault the crown is taken off, which skips another set. Rhino Skin is then taken when hitting level 9, through set 10.
|

|
|
Heavy Heart

|
-
Always appears in the next set after taking 3 weapon-specific
mutations, once in a run.
-
(Any 3 of Boiling Veins, Bolt Marrow, Laser Brain, Long
Arms, Recycle Gland, Shotgun Shoulders)
-
Will REPLACE the first slot mutation of the next set seen.
-
Can be granted by Crown of Destiny if the condition is met.
-
If Heavy Heart is placed on the normal sets on the daily sheet
that means that the mutation underneath it is unknown.
-
Example: Heavy Heart doesn't actually appear in
set 7, it's simply what the scout saw. Any mutation that the scout
did not take could be underneath Heavy Heart, besides
other mutations in that set.
|
 |
|
Hostile Horror

|
-
Used to signify if a route spawns Hostile Horror, which is used
if extra rads needs to be gained by 3-2 for destiny.
-
Skipping 2 rad cans spawns Hostile Horror, who can give up to
115 rads.
-
Opening 3 normal rad cans gives 75 rads. This is not a huge
difference, but can close the gap for tight leveling.
-
Example: Hostile Horror is suggested to visit before the first vault,
because reaching level 5 in time may not be possible otherwise.
|
 |
|
Cursed Crystal Caves

|
-
Used to signify if a route uses CCC, as it has a very high rad
yield for preloop.
-
These extra rads can be used for loop starving if a particularly
high level needs to be reached.
-
Can also be used if Last Wish appears in a particularly late set
but Jungle needs to be visited in preloop.
-
Example: Route where CCC is visited before reaching
5-1, in order to get Last Wish in time for preloop Jungle.
|
 |
Melting Mechanics
|
|
Detachment

|
-
Used in place of the Ultra icon, for routes that uses
Detachment.
-
Taking Detachment will cut Melting's current HP in half and give
3 mutations in return.
- Ultra will cause a set to be skipped similar to vault skipping, and then give
three new mutation sets following that.
- Example: Ultra is hit after seeing set 8, in which Detachment is taken.
This skips set 9, so the next sets seen are 10-12.
|
|
|
Crown of Death

|
-
Signifies when Crown of Death should be taken in a route as
Melting in order to get both Detachment and 6 max HP.
-
This entails taking Crown of Death before reaching ultra
and then taking it off in any Vault afterwards. As only three
Vaults spawn in a run, this means that only one at most can be
visited in preloop.
-
(Exact tech: Crown of Death reduces max HP to 1. Detachment
halves HP, which just keeps it at 1. Rhino Skin is gained from
Detachment, which increases max HP to 5. Once Death is removed
the 1 max HP will be returned, which brings Melting up to 6.)
-
As Crown of Death is required before hitting ultra to
get this to work, preloop Oasis skip is popular to require less
radstarving.
- Example: A route where Crown of Death is taken to skip a set before
ultra. It follows similar mechanics to a normal Detachment route, Crown of Death
should only be taken off after ultra.
|
|
These icons largely start as memes on the NT Discord and get used on the
daily sheet, usually as a way to label a route. These are not mechanics
in any way and thus does not have to be treated seriously.