Character Overview
Chicken is the ninth character in the game and is unlocked by reaching
5-? (Jungle) as any character. Her starting loadout
includes her Chicken Sword, an ammoless melee.
Her B-Skin is unlocked by reaching 2-1 as her on hardmode.
Her C-Skin is unlocked by running the black sword as one of her two weapons when defeating all 9 unique bosses
in a run, which includes Captain.
(Alternatively, putting the Black Sword into the Proto Chest and using it as any character is also allowed.)
Chicken A Sprites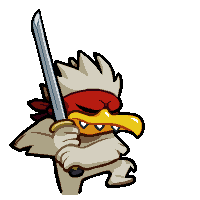
|
||||
|---|---|---|---|---|
Icon |
Chicken B Sprites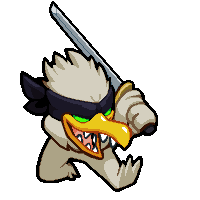
|
Icon |
Headless Sprites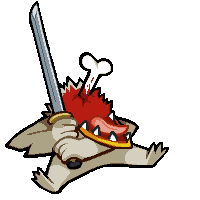
|
Idle |
Idle |
Idle |
Walk |
||
Walk |
Walk |
Death
|
||
Chicken C Sprites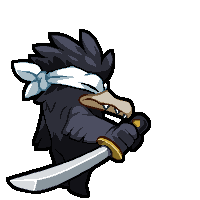
|
Icon |
Headless C Sprites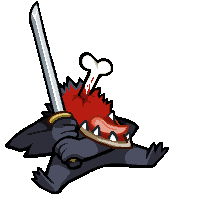
|
Idle |
|
Idle |
Walk |
|||
Walk |
Death
|
|||
Abilities
Active: "Can Throw Weapons"
- Using RMB will cause Chicken to throw her held weapon in the direction of her cursor.
- Weapons must be picked back up manually unless if running a specific ultra. Throwing weapons will reset their cooldowns.
- Throws deal 24 damage at base, and will gain 2 additional damage per level. Caps out at 42 damage at ultra.
- Enemies killed by a thrown weapon will take substantial corpse knockback.
- Thrown weapons will bounce off walls upon contact, and will also have a slight bounce off of enemies.
- Shields can deflect thrown weapons which can then harm Chicken.
- Cursed weapons cannot be thrown. Running two cursed weapons will restrict Chicken's active entirely.
- Weapons can be thrown into range of a portal, bringing them to the next level.
- During the Throne II fight weapons thrown out of the arena cannot be retrieved until the fight is over.
- Update 99 Bug: As thrown weapons are counted as projectiles, if a portal opens while a weapon is actively moving it may be erased. This is fixed on update 100 & NTT v100.
| Throwing Damage | ||||||||||
| Level: | 1 | 2 | 3 | 4 | 5 | 6 | 7 | 8 | 9 | Ultra |
| Damage: | 24 | 26 | 28 | 30 | 32 | 34 | 36 | 38 | 40 | 42 |
Passive: "Hard To Kill"
-
Chicken will become headless if she ever reaches 0 HP.
- Strong Spirit being consumed will always take priority over going headless.
- Any time Chicken goes headless she will lose 2 max HP. Any time a health chest is opened it will give back 1 max HP, while Last Wish will return her to full.
- She will regain her head if health is obtained in any way.
- A 4 second timer will start regardless of max health, killing Chicken if no health is retrieved in time.
- The timer will reset to 4 seconds if Chicken exits the level in time.
-
While headless the camera will focus in on Chicken's head rather than
her body, which can be limiting to movement.
- Chicken's head counts as a corpse and thus can be 'revived' by a Necromancer or Popo Freak. This will then cause the camera to focus on her body instead.
- Common ways to heal include collecting a health pickup, Bloodlust proc'ing, or walking over a health chest.
- Uncommon ways to heal include taking Last Wish/Rhino Skin from a level up screen, running Crown of Protection, or entering a new level with Crown of Luck as it sets HP to 1.
- Thrown weapons will now pass through enemies regardless of their HP instead of stopping.
- After each enemy hit the thrown weapon will slow considerably.
- Able to damage larger targets multiple times as it slows down, however Throne Butt also causes thrown weapons to respect enemy iframes.
Ultra A: Harder To Kill |
Ultra B: Determination |
||
 |
 |
||
Harder To Kill Ultra: "Kills Extend Bleed Time"
- While Chicken is headless, any enemy killed will add 0.5 seconds to her headless timer.
- Will never exceed 4 seconds on the timer, so spacing out kills is beneficial in some situations.
- Destroying props do not count as kills and do not give extra time, while destroying Vans will.
- As Throne and Throne II do not count as kills, they will not give extra time.
- After weapons come to a complete stop it will teleport back to the players secondary slot.
- Weapons will not return if they enter a portal, or if Chicken picks up a new weapon during this time.
- Only having one weapon will just bring it back to the primary slot. Throwing both weapons will teleport them both back.
- If more than two weapons are thrown at a time, only the first two that stop will teleport back. (Unless if RMB is continually spammed.)
Chicken will start with a Chicken Sword, an ammoless melee. If this is left on 1-1 L0 (not dragged through the portal), a Black Sword will spawn on 1-1 L1. Same applies to 1-1 H1/1-1 H2 in Hardmode. Black Sword has a secret attribute.
| Weapon | Fire Type | Reload | Damage | Spread Angle |
Chicken Sword
|
Single Swing | 0.60 sec | 6 | 0° |
Black Sword |
Single Swing | 0.53 sec |
12 Secret:80 while Chicken is headless |
0° |
Regaining HP Guide
Chicken can only regain her max HP by either taking Last Wish which isn't usually applicable, or walking over health chests which will give her back 1 max HP at a time.
Health chests have a 50% chance of replacing the rad canister in a level if Chicken is under half health when entering the level. Being on half health is based on original HP, meaning that Chicken needs to be at 3 HP or below normally, or 5 HP or below while running Rhino Skin.
Given this knowledge, Chicken can force health chests to spawn by
self-damaging herself at the end of a level before going through the
exit portal. The most common way is to use weapons, although one enemy
could always be kept alive until it damages Chicken enough (and hope for
no health pickups from it).
Some of the best weapons for self-damaging are:
- Blood Hammer: Damages for 1 HP for every missed swing. (Most recommended)
- Toxic Bow & Toxic Launcher: Damages for 3 HP for every toxic cloud. (Recommended)
- Blood Cannon: Damages for 2 HP every time Chicken is out of ammo, which requires emptying her entire explosive ammo. (Only use if no other option)
- Blood Launcher: Similar to Blood Cannon, dealing 1 damage every time Chicken is out of ammo. (Only use if no other option)
- Disc Gun: Deals 6 damage a hit and is risky to use in anything except an open field. (Only recommended if HP is high enough)
-
Any explosive weapon: Deals 5 damage twice for 10 damage. Trying to
take just half damage is very difficult and risky. (Not recommended
unless if sacrificing Spirit out of desperation, or if at 11/11 HP and
the weapon only causes a single explosion.)
- If running Boiling Veins, it will only set Chicken low on HP enough if also running Rhino Skin. (Recommended under this condition)
Health Chests do not spawn on 7-3 or 0-1, so Chicken shouldn't bother self-damaging on 7-2 or 7-3.
Preloop Strategy Guide
Chicken is a good character in preloop as her active/passive are very helpful, although she only really shines as a higher tier character by loop.
She will start any run with the Chicken Sword, which does the same damage as a Screwdriver but with bigger range and deflects. This is a decent melee start but can easily be traded off early on for other weapons.
Active Ability
Rating: Useful
Chicken can throw weapons at any time which acts like an extra form of
free damage, although this can leave her more vulnerable. For this
reason it's usually best to only ever throw one weapon at a time,
keeping her second weapon to use while trying to recover the other.
Throwing is usually best to use on mid to larger sized enemies who have
more health, although if they don't immediately die retrieving a weapon
may be difficult. Throwing weapons will be a lot less useful option
against hordes of smaller HP enemies. If any weapons drop that Chicken
isn't planning to use, she can quickly swap to it to throw it at a
nearby enemy, picking back up her regular weapon.
A perk that's unstated in-game is that Chicken can throw weapons into portals, so she could always bring weapons she finds useful to the following level. For example if a Minigun drops on 5-3 but Chicken is already running two good weapons, she can throw it into the exit portal to help clear 6-1 as they sometimes have nasty spawns, then returning to her original weapons to fight through Palace with. Similar approaches work with bringing extra weapons specifically for boss fights.
Passive Ability
Rating: Useful
Being headless is mostly meant as a safety net to give Chicken the
chance to comeback, and should be avoided as much as possible just like
normal dying. Regaining health can actually be difficult during preloop
as enemies are fairly spread apart and more sparse, so it's important
not to panic and to try to focus in on any enemies that can drop health.
It's useful to be familiar with enemy
droprates, as for example if Chicken goes
headless in the Frozen City, Wolves only drop rads while
Snowbots/Snowtanks can drop pickups, which is where she should
prioritize to have the best chances of regaining her head. Pausing the
game to think where to push next instead of panicking is also really
helpful.
Throne Butt Ability
Rating: Somewhat Useful
This allows Chicken to damage multiple enemies at a time or multi-hit
larger targets, but this comes at the cost of her weapons ending up much
further away. It's best to use this Throne Butt with any weapons found
on the floor instead, anything that limits active usage should probably
be skipped though.
Mutations
Chicken can go a lot of different direction in terms of what mutations
to take. Rhino Skin lets her go headless more times before running out
of max HP, Rabbit Paw/Bloodlust makes her more likely to recover while
headless, and Strong Spirit can help prevent her from going headless at
all as an extra layer of protection. Last Wish can always be taken to
fully regain max HP, this is best taken before 5-1 so Chicken doesn't
have to go to loop to reroll.
Loop Strategy Guide
Chicken is able to work very well in loop as health drops are more abundant making her passive a strong asset to the run. Another character taking lethal damage in a different run may just be an inconvenience to Chicken, although she will then need to put in work regaining max health. With how unforgiving loop is at times this makes Chicken a very strong character for having a great form of recovery and a modest amount of extra damage.
If Chicken Sword is left on 1-1 in preloop she will get the Black Sword, which does an underwhelming amount of damage and won't really hold up in loop against any number of high HP enemies. The secret attribute of very high damage if headless is worth seeing, but obviously has its own limitations as going headless will cost Chicken max HP and risk dying.
Harder to Kill
Rating: Useful
This ultra leans into Chicken's passive which allows her to be alive for
as long as she can keep killing enemies while headless. This removes
pretty much any chance that she will die before regaining health,
although the ultra has two glaring flaws. The first of which is that the
timer will cap at 4 seconds which limits how long it can be used for,
unless if she spaces out kills for as long as possible. The other issue
is that the camera is locked to Chicken's head, making it so she can
rarely explore off-screen. Her ultra is best taken to avoid unlucky
situations in which health drops are suddenly sparse, but it may not
come in handy as much as it should; health drops usually are not an issue at 0 HP,
especially if running any health mutations.
Determination
Rating: Useful
Chicken's throws reach their max damage (42) at ultra, which is very
useful against most mid to large sized enemies. Her active is furthered
by Determination as she can always carelessly throw one of her weapons
at any enemy, knowing it will return to her momentarily. Some enemies
this is particularly useful against are Jungle Flies, Elite Grunts and
Elite Inspectors who are all killed in one shot on Loop 1, and Loop 2 as
well if running Scarier Face. Weapons can always be thrown as a panic
button as well while Chicken runs back towards her spawn, or if she ever
runs out of ammo.
Another upside of Determination is that throwing weapons will reset its cooldown, meaning that if Chicken is running any weapon that has a high reload speed she could always fire them and then throw them, without having to wait for them to reload. This is particularly useful to any run without Trigger Fingers, although isn't the fastest method.
Determination or Harder to Kill?
While this guide is more harsh towards Harder to Kill, it is still
useful in furthering Chicken's recovery capabilities and can even be
paired with Black Sword gameplay. Harder to Kill comes into effect at
important points of the run, while Determination is used across the
entirety of the run, meaning taking either is worthwhile.
Throne Butt Ability
Rating: Detrimental (Harder to Kill) or
Somewhat Useful (Determination)
Chicken's TB in loop is only really useful if used in a specific way,
hurting Chicken's run otherwise. It should be skipped over for that
reason.
With Harder to Kill: Taking Throne Butt is never worth it as throwing
her active weapons could cause them to end up very far away, meaning she
only should limit active usage to throwing weapons on the ground, which
may also only get to be thrown one time.
With Determination: This causes weapons to take longer to
teleport back to Chicken as it will pierce through enemies. It can be
used for extra damage but many other mutations in its place would be
immensely better.
Mutations
Other mutations on Chicken is up to whatever the player finds the most
useful as usual, although it should be overstated how useful Rhino Skin
is with Chicken's passive (and as a mutation as a whole). Going headless
once would put Chicken at 6 max HP normally, or 10 max HP with Rhino
Skin, which is like night and day in terms of how much harder it makes
the game. Another reason would be for the minimum HP thresholds for
regaining health chests, Chicken would need to start a level at 3 HP
normally or 5 HP with Rhino Skin, all the while taking 3 damage is one
of the most common types of damage in the game.
Meta Strategy Guide
Note that this is an advanced guide, it is meant to be used by those primarily looking at loops 3+. This builds off of content shared in the meta guide.
Chicken is considered a higher tier character in meta loops, although she will be outshined by other top tiers (Crystal/YV/Eyes) in the very late game, before that point she is still a phenomenal pick.
Passive Ability
Rating: Meta Defining (Leans towards
Very Useful in much further loops)
Chicken's passive is one of the main reasons on why she is considered so
viable. In many characters' cases death is one bad misplay away, which
makes deeploop very unforgiving - misjudging the timing of a Van, or
playing a bit too aggressively with Bandits, or getting stuck in rapid
Laser Crystal damage for examples could just instantly end over an hour
(or hours) of work. In Chicken's case, she can usually come back from
that and continue the run mostly as normal, although having to put the
time in to regain max HP.
A large part of why Chicken is considered to be very good, but not a popular pick is because regaining HP does take extra time in a run that may impact the flow of deeploop. While she is undoubtedly a great character, she also may not be as fun as other characters. In other words she can be an acquired taste.
Chicken's passive also does not remain amazing forever as in very late game if she loses any substantial amount of max HP, recovering that may be near impossible, which just delays the inevitable. However this is pretty far into the game, making her an incredible option for anyone learning deeploop or wants the game to be a bit less unforgiving until that point.
One important part of Chicken's passive is the question of if her meta
set would run Bloodlust or
Rabbit Paw.
When Chicken goes headless she can ignore any damage as she is at 0 HP.
However she doesn't have any invulnerability when regaining her head,
meaning that Bloodlust could proc randomly, Chicken regains her head,
and then immediately lose it again. For this reason some Chicken players
prefer to run Rabbit Paw, as health pickups are very predictable. If
Bloodlust is the preferred healing mutation then be extra vigilant when
Chicken's head is lost.
Harder to Kill
Rating: Somewhat Useful
Similar issues in the loop guide for Harder to Kill also applies here.
In most situations health will be abundant, meaning that Chicken will
usually regain her head in a very short span. The camera is also still
locked to her head instead of her body, so she will usually be stuck to
one spot. There are specific situations in which Harder to Kill will
save Chicken such as if she happens to go headless at the very end of a
level with very few enemies around, however these are uncommon
occurrences which makes most players prefer to run Determination. Harder
to Kill can always be run as an additional safety net.
Determination
Rating: Useful
Determination can benefit the run in multiple smaller ways which makes
it useful to take. While Chicken's active is not nearly as meta-defining
as her passive, this gives her active some extra utility as well.
Firstly Chicken's throw can deal 42 damage which can one-shot Popo Freaks up to L8 normally, or L15 with Scarier Face. Throwing weapons takes more of a backseat but can still always be used as some extra damage at any point against Popo Freaks/bosses while running Determination. Still be careful on pre-u100 version as any weapons in motion at the end of the level can be erased, which could cause Chicken's run to be ruined. Throwing weapons is completely safe on update 100 and NTT v100.
As mentioned in the loop guide, another useful perk is that throwing weapons will reset weapon cooldown. This can be used for SPC without having to rely on Trigger Fingers procs at any point, it will be the most useful during the Throne fight before any Guardians are awakened, and the Throne II fight to avoid having to walk to the center of the arena each time to hotswap. There's also some usage in Big Bandit and Mom fights, while really situational.
The last perk of throwing weapons that is understated is that if Ultra Shovel is ever thrown, it will give a 100% ammo droprate to SPC. For example on the Throne fight if Chicken destroys a generator and it drops ammo, Chicken can throw her ushovel at the Throne right before collecting it and get guaranteed energy. This is obviously risky to throw ushovel out haphazardly as it is her main form of defense, so some practice is important here to properly utilize in a safe manner.
Throne Butt Ability
Rating: Detrimental (Harder to Kill) or
Neutral (Determination)
This is not an efficient use of a mutation slot in meta. It does not
benefit Harder to Kill in any meaningful way, and it extends the time
for weapons to return through Determination which can be considered a
downside in some situations.
Extra Tips
Chicken's active can be used to bring any weapons for specific boss
fights through multiple levels, such as Energy Hammer for Big Bandits or
Super Crossbow for Mom.
Even if Chicken is at max HP she can optionally self-damage before boss
levels to make a health chest likely to spawn (exit a level at 5 HP or
below if running Rhino Skin), in the event she goes headless here she
could quickly regain one of those lost max HP.