Character Overview
Plant is the fifth character in the game and is unlocked by reaching 3-1
(Scrapyards) as any character. They have a normal starting loadout with
the Revolver.
Their B-Skin is unlocked by reaching (sitting on) the
Nuclear Throne in under 10 minutes as them.
Their C-Skin is unlocked if they have three blood-related things on their loadout.
Any combination of Crown of Blood, Bloodlust mutation, and blood weapons works. (Co-op ultra Blood Bond also counts.)
Plant A Sprites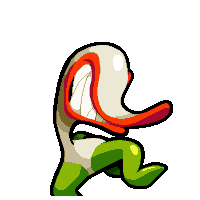
|
||||
|---|---|---|---|---|
Icon |
Plant B Sprites
|
Icon |
Plant C Sprites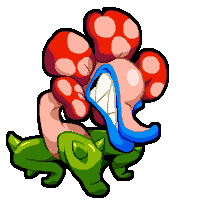
|
Icon |
Idle |
Idle |
Idle |
||
Walk |
Walk |
Walk |
||
Death
|
Death
|
Death
|
Abilities
Active: "Snare Enemies"
- Pressing RMB will cause Plant to shoot a seed in the direction of their cursor. It will become a snare upon contact with any prop/enemy/wall.
- Snares will hinder enemies movement as long as they are standing within it, will not hinder Plant at all.
-
How slowed enemies are is dependent on their size. Maggots will be
completely stopped, while the Throne will largely ignore it.
- Vans are the exception, they are completely stopped in snare while in motion. However they can be pushed by enemy bullets.
-
Shooting another seed will erase the current snare. If a seed has yet
to make contact with anything, pressing RMB will do nothing.
- Throne II's arena has no walls, but there are invisible borders far out in the level that the seed will make contact with.
- Snare will act as a light source in any dark areas.
-
Holding RMB will cause snare to be placed and pull Plant's vision in
that direction. The further the snare is from Plant the further they
can see.
- Will not work if something else is pulling the camera, which includes the Throne waking up or an open exit portal.
- Snare will not interact with most projectiles.
-
It will completely stop enemy fire and slow toxic gas.
- Mom's toxic blast is a different attack and is NOT slowed, just the toxic from it.
- Enemies will take knockback at the same rate despite the slower speed, which can cause them to get pushed around on snare.
-
On older versions (u99) this can cause some enemies to get pushed into walls,
especially with any repeatedly hitting weapon.
- The most notable example is Hyper Crystal who can get pushed into a wall entirely which makes her go out of bounds. In later loops, she has enough HP to keep travelling further away until she eventually dies to out of bounds damage. (Takes 100 damage every few seconds.)
- The Throne can get pushed around really hard and destroy walls making it off-center easily.
-
On update 100 this is severely reduced to prevent enemies from getting
pushed into walls.
- The Throne can still get pushed easily by snare, but not into walls.
- Shielders can deflect seeds and it will 'change teams' and can hit Plant, but the snare itself will always remain on Plant's team as intended.
- If an Elite Shielder attempts to teleport to a snare it will flash there momentarily but then return to its original position.
- Mutants have a default speed of 4, while Plant's is 4.5 which is similar to the Extra Feet mutation.
- Plant is still affected by terrain movement, this only changes their speed.
- Taking Extra Feet will increase Plant's speed to 5 instead.
- (These are based on the game's code without applying friction, which is technically a bit different in practice.)
-
Any enemy standing in a snare will automatically die if they are at
33.33% health or below.
- Vans are included in this, while props are not.
- On older versions (u99) the threshold was simply 33%.
-
Scarier Face fully removes 20% of enemies max health, meaning
that TB only affects them at 33% of their new value.
- Face and TB stacked together translates to about a 47.4% total health reduction from their original HP, instead of a flat 53% reduction as one would assume.
- If an Elite Shielder attempts to teleport to a snare and is under the threshold to be killed by TB, they will instantly die but at their original position before teleporting. If they drop a pickup it will be at that location instead.
| Ultra A: Trapper | Ultra B: Killer | ||
 |
 |
||
Trapper Ultra: "Big Snare"
- Plant's seed will be shot out as normal, but upon contact it will break into 6 snares instead, with one in the center.
- If shot at a wall some of the snares will crowd together instead of being perfectly spread out.
- All snares will act the same way, slowing enemies and each providing a light source in dark areas.
- Update 99 Bug: Laser Crystals circling around Hyper Crystal while in a snare may glitch out as their hitboxes get disjointed from their sprites, meaning it's impossible to see where they actually are. Undoing snare fixes this. It's somewhat possible on normal snares, but prominent with Trapper. This is seemingly fixed on update 100.
- If an enemy is killed within Plant's snare it will cause a Sapling to spawn.
- Saplings have 10 HP and will circle widely around the player.
- If any enemies are in range they will rush it down and explode on them. Will not target props.
- Will also explode if they run out of health. Their health will naturally decay and will die on their own after ~13 seconds.
-
These do 5 contact damage then will cause 3 blood explosions, as well
as drop 3 rads. They do not drop pickups or weapons even if running
Crown of Guns.
- Blood explosions do up to 4 damage a hit three times respecting enemy iframes, doing up to 12 damage total to any single target.
- Similar to blood weapons, blood explosions can erase enemy projectiles and cause enemy explosions to go off, such as IDPD grenades.
-
Some mutations will apply to Saplings as well.
- Killing enemies can cause Trigger Fingers to proc for Plant.
- Can also cause Bloodlust and Lucky Shot to proc.
- Impact Wrists also applies to enemies killed by them.
Preloop Strategy Guide
Plant is often overlooked by newer players as they have a fairly modest start, only really increasing in viability by loop. However, during preloop they still have chances to shine as their Throne Butt mutation significantly cutting down time on longer boss fights with ease.
Active Ability
Rating: Useful
Snare is a tool that has limited usage initially, it's fairly small and
only limits enemy movement. It doesn't affect most enemy projectiles,
although it will completely negate Fire Salamanders and Fire Traps.
Otherwise its best usage is helping create more efficient chokepoints in
narrow hallways, preventing taking contact damage in close-range combat,
and helping keep bosses/bigger enemies to stand more still for easier
weapon aiming. It's a utility active that has various, smaller uses in
different situations.
Passive Ability
Rating: Somewhat Useful
Getting some extra speed isn't a necessity to Plant's run yet still will
work decently with their active. If Plant is damaged badly they can
snare enemies while making a faster retreat, as well as circling around
enemies to dodge attacks is more effective. So this is one of the more
average passives, but is still nice to have.
Throne Butt Ability
Rating: Very Useful
The crowning achievement for Plant's preloop play is Throne Butt, which
kills any enemies under 33% of their remaining HP. This means that any
enemies and bosses only need ~67% of their health removed in order to be
killed which reduces the chances of death during encounters and also
reduces the amount of ammo used to kill anything. It also stacks well
with Scarier Face taking around half of their original HP.
While this only sort-of helps with low HP enemies, sometimes it can make
mid HP enemies to die in one hit to weapons they would not to otherwise,
but really is the most useful for any tankier enemies or bosses who
usually need to be dispatched quickly. This is one of the best mutation
picks in preloop.
Summary
Plant is pretty much just a mid-tier character during preloop that has
some higher-tier viability if running Throne Butt. They have pretty
different gameplay than other characters though which makes them worth
committing a few runs to at least to get a feel for; their viability by
loop changes a lot.
Loop Strategy Guide
Plant is significantly stronger in loop, which in large part is due to one of their ultra picks. One big factor as well is how Plant's snare will completely will stop Vans which helps protect them from ever getting hit by them. Just be aware that while on the snare Vans can easily take knockback from enemy projectiles and get pushed out of it, they are trivialized as a threat otherwise.
Trapper
Rating: Very Useful
This is easily Plant's better pick of ultras as it massively increases
their viability. Snare will cover a far larger portion of the level
meaning that Plant can constantly control groups of enemies rather than
just individual ones, and it takes them much longer to escape the
effects of snare. This always gives Plant a lot more breathing room
which helps them take contact damage far less often - especially useful
in Labs or Palace with rushdown enemies. The important part of snare
usage is to constantly be using it for most situations to take full
advantage of its benefits.
Trapper can also more effectively hold Vans, the best way to use this is to shoot the snare at the back of the Van. When it unloads IDPD, Plant can instantly kill most/all of them in one spot. It is also very useful to use snare near IDPD portal spawns to help in case of Elite Grunts spawning who will move much slower and easier to react to, or Elite Inspectors who between their slower speed and Plant's extra speed will struggle to ever actually pull Plant close enough.
Killer
Rating: Useful
This works decently well in loop. Plant can chain Sapling spawns
together by killing a low HP enemy in their snare, then shooting their
snare at the next low HP enemy that their Sapling would likely target.
It's something that is particularly useful in areas such as Desert,
Sewers and Labs as they do a modest amount of damage with a modest
amount of AoE which can serve as a third source of damage for Plant,
although this still limits snare's direct usefulness (while Trapper
boosts it). Some practice may be needed to effectively use Killer to try
to get as many Saplings as possible. It's easy to underutilize this
ultra during a run.
Throne Butt Ability
Rating: Very Useful
Throne Butt is simply amazing when paired with Trapper. If Plant
actively uses their snare on enemies then it's a constant large area in
which enemies will only need 2/3rds of their health removed in order to
be killed which helps deal with enemy clusters. As mentioned Trapper is
also great with denying area control to IDPD, and paired with Throne
Butt this makes them really non-threats. Trapper + TB is undoubtedly one
of the best combinations in loop given how oppressive IDPD can sometimes
be.
Paired with Killer it's fine and enables more Sapling chaining, although
with snare's limited area in this condition it will be the most useful
in just helping kill bosses quicker, which still makes it a great
mutation as the bottom line.
Meta Strategy Guide
Note that this is an advanced guide, it is meant to be used by those primarily looking at loops 3+. This builds off of content shared in the meta guide.
Plant is considered to be around a higher mid-tier character due to how many situations their snare can come in use, while not quite a powerhouse they are definitely a strong character.
Trapper
Rating: Very Useful
This is the best pick for Plant. They can constantly use snare to hold
enemies closer together, and is effective against most bosses detailed
below. One of the biggest perks is still how it completely stops Vans -
these start exploding in loops which can instantly kill the player, but
Plant's ability to stop them is full area denial. In some situations
Plant can stop Vans from both sides while standing near the middle of
their snare, although this is dangerous in later loops due to the
explosion radius of stacked Vans. Be especially careful in areas such as
Desert as any number of Gold Scorpion bullets can push Vans at an
alarming rate over snare, which can directly lead to Plant's death.
Snare's strongest area will be Palace, which is usually a really dangerous area. Plant is given significantly more reaction time to Dog Guardians pouncing and can hold spawn much easier, which is something that weaker characters can struggle with. A good Plant player should rarely ever die in Palace, just make sure to constantly have snare over the majority of enemies and be swinging ushovel the moment any of them pounces.
Killer
Rating: Detrimental (or
Somewhat Useful with Veins)
Plant being stuck with their default snare size makes this ultra not as
useful as Trapper. Saplings themselves are not necessary in terms of
damage and worse of all they can proc IDPD grenades which can be an
active threat to the run. If wanting to try Killer out in meta loops
then Boiling Veins is strongly suggested.
Passive Ability
Plant's passive gives a nice boost for quickly maneuvering around levels
and during boss fights making it a decent passive. However a
lot of gameplay is based on muscle memory and playing with the extra
speed often causes players to make mistakes walking into
bullets/explosion misjudging their speed, making Plant less popular as
more time needs to be put forth to adjusting to this different movement
speed.
Throne Butt Ability
Rating: Very Useful
Plant's Throne Butt is considered to be one of the best TB's in the
game. Any groups of enemies that snare covers is killed very easily, and
paired with Scarier Face makes it absurdly useful. Bosses are one of the
biggest threats in deeploop but with ~47% of their original HP being
removed with TB + Face means any fight is cut nearly in half than if
neither of the mutations were being ran. Popo Freaks will die to one
ushovel swing under TB's effects up to Loop 10, and stacked with Face extends all the way to L17.
This works best for when many Popo Freaks all revive in the same
grouping.
Mutations
Even with how good TB is, it may not be Plant's most optimal
set. The question isn't how good Throne Butt is, but rather what
mutation it can replace. Plant has a few options for sets:
| Core Mutations | Choose 2-3 From: | Choose 0-1 From: | ||||||||
|
|
|
|
|
|
|
|
|
|
|
|
Standard p9 may be the best option here, running Paw instead of Bloodlust is always up to personal preference. However Plant has some other combinations to try:
- Triple Damage entails running TB + Face + Brain. This makes Plant one of the highest damage characters in the game, but at the cost of no healing mutation which can make pushing difficult sometimes and recovery annoying. It is worth trying though as it absolutely decimates bosses.
- Face + Butt + Healing will drop Laser Brain which is used for crowd clearing, requiring more ushovel use for crowds which can be slower but still effective.
- Brain + Butt + Healing is also really powerful at handling bosses, although many deeploop players dislike faceless runs and may pass on this.
Each of these builds have their own upsides and obviously is up to preference on which 7th-9th mutations seem the most useful. Trying out at least one combination with Throne Butt is strongly encouraged to see what gameplay is like when Plant leans into their snare as much as possible, and how satisfyingly quickly bosses will get taken down. Those looking for the best sets may try just sticking to just any old p9, however.
Boss Strategies:
Big Bandits will go better for Plant than a lot of other mutants. If Plant is running from Bandits they can shoot their snare against a wall, causing Bandits to charge through all of that just to reach Plant if coming from that direction. Plant can then use ushovel to get more swings in before any Bandits get too close, making it a lot safer and losing important cover a lot less often. If they are unable to get snare at the opposite side of the wall it can still be used - instead putting snare on the inside of the wall, so if Bandits end up charging too close then it still puts Plant at a much lower risk of ever taking charge damage.
Mom will be trivialized in early loops by Plant's active as she is moves extremely slowly through snare and is an easy target. Be careful of toxic blasts still, as they can travel through the snare freely. Once Mom starts to speed up in later loops snare will not be as effective to constantly use against her. If Plant is hiding near a corner (a common strategy) then snare can be shot near the corner in a way that forces Mom to have to walk through it in order to reach Plant, increasing reaction time. Even snare's extra lightning can come in handy at this point to minimize the amount of darkness on-screen.
Throne II will still give Plant a difficult time. The
preferred way to handle the T2 fight is to use perfect shots at the
right angles, however Trapper slowing down T2 will actually make perfect
shots harder to execute. This means that it's best not to use snare in
this fight specifically, focusing on the fight as normal. If running
Throne Butt then after its low health noise, Plant could routinely try
to see if TB will proc or not. (If seed misses it will need to travel
all the way to the edge of the arena which will take a few seconds until
it is usable again.)
In other words unless if Plant is fighting T2 with Throne Butt, their
fight will go the same as other characters.
Other bosses of note includes,
On update 99 using Trapper on Hyper Crystal is dangerous as it can cause
Laser Crystals to get disjointed from their hitboxes. Be sure to
constantly be re=placing snares to be safe.
On update 100 using Trapper on Hyper Crystal is a lot safer, although be
aware that if Laser Crystals are stuck against walls they may 'pop' out
in an unexpected way, so don't stand by walls while doing this.
For update 99 be aware that it's really easy to push the Throne
off-center which can make its laser beam harder to remember off-screen,
using snare lightly for this fight is fine as slowing the Throne down
does not provide any significant advantages.
For update 100 this is largely fixed as it's very difficult to push the Throne
into any walls.