Character Overview
Crystal is the second character in the game and one of the two unlocked
by default. She has a normal starting loadout with the Revolver.
Her B-Skin is unlocked by reaching 4-? (Cursed Crystal Caves) which is done
by exiting 3-3 with any cursed weapon found by running a crown.
Her C-Skin is unlocked by taking 100 damage over the course of a single run.
Crystal A Sprites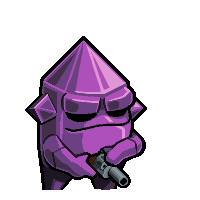
|
||||
|---|---|---|---|---|
Icon |
Crystal B Sprites
|
Icon |
Crystal C Sprites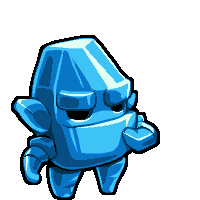
|
Icon |
Idle |
Idle |
Idle |
||
Walk |
Walk |
Walk |
||
Death
|
Death
|
Death
|
Abilities
Active: "Can Shield"
- Crystal can hold down RMB to create a shield that lasts for about 1.5 seconds which protects from enemy projectiles.
- Pressing RMB will create the shield for only a moment, and can be done repeatedly.
- Once her shield goes down there is an extremely brief cooldown that she cannot shield again for.
-
Weapons cannot be fired while shielding. However, they will still
reload at a normal rate during this time.
- Weapons can be swapped with ones on the ground while shielding.
- Enemies may lose sight of Crystal while she is shielded; particularly noticeable during the Throne fight as it may walk down directly onto her if it cycles attacks while she is shielding.
- Gamma Guts can damage any enemy that manages to make contact through the shield.
- Crystal's shield works a lot like IDPD shields. If a Shielder can deflect it, there is a good chance Crystal can too.
Crystal Deflects:
- The following list will reference the enemy page.
-
Deflected projectiles will join the player's team, which will
instead harm enemies:
- Bullet projectiles that does 3 Projectile Damage, such as ones used by Bandits, Grunts or Fireballers.
- Shell-type damage such as pellets from Gators, flak balls from Buff Gators, or slugs from Inspectors.
- Also includes cars being thrown by Snowbots.
- Projectile Maggots (from Flies) will be deflected but stay on the enemy team.
- Discs will no longer harm Crystal if deflected.
-
Some enemy projectiles will be erased instead, not dealing damage to
anything:
-
Pellet bullet projectiles that do 2 Projectile Damage, such as
the ones used by Scorpions, Ballguys or Explo Guardians.
- Also used by Throne II's 'laser beam' attack.
- Guardian orbs including larger ones, although larger ones may still break into normal orbs if shielded at a specific angle.
- Toxic and Flames that can come from enemies, hazards or toxic weapons.
- Hostile Horror's rad beam.
-
Pellet bullet projectiles that do 2 Projectile Damage, such as
the ones used by Scorpions, Ballguys or Explo Guardians.
-
Crystal is not invincible while shielding. Some things can still
damage her:
- Any explosion damage from enemies, hazards or player weapons.
- Enemy melee attacks from Assassins and Elite Inspectors.
- Lasers and Lightning damage from Laser/Lightning Crystals.
- The Throne's main laser beam.
- Enemies that deal contact damage may be pushed away from Crystal, but may still hit her depending on the speed and angle.
- Plasma orbs from Elite Shielders will be stopped, however this can be dangerous as plasma explosions can sometimes damage Crystal through the shield if she starts shielding while directly on top of one.
Passive: "More Max HP"
- Crystal starts with 2 extra max HP, for a total of 10.
- This can be stacked with Rhino Skin for 14 max HP.
- Crystal will shield for roughly 1 second and then will teleport to the location of the player's cursor.
- If the player's cursor is over a wall, Crystal will simply not teleport.
- Cannot teleport out of an exit portal.
Ultra A: Fortress |
Ultra B: Juggernaut |
||
 |
 |
||
Fortress Ultra: "+6 Max HP"
- Crystal will gain 6 more max HP which stacks with her passive, giving 16 max HP.
- Can be stacked with Rhino Skin for a total of 20 max HP.
- Crystal shields for the same amount of time but can move during this in any direction.
- Throne Butt will still reduce the amount of time shielding for.
- Hammerhead can be used while in this state.
Preloop Strategy Guide
As Fish and Crystal are both characters unlocked by default, they both make for great starter characters to learn the game with. In Crystal's case hers is all around extra defense, which is useful while learning to avoid taking damage.
Active Ability
Rating: Very Useful
Crystal's active may seem like a mixed power as she is forced to stay
stationary and cannot fire her weapon, however this is still a very
useful ability as she can choose at any time to undo the shield. Correct
shield usage is all about timing - Crystal can time her shield to
deflect enemy bullets, then let go of her shield once the projectiles
are dealt with and continue on. If an enemy ever fires in close quarters
Crystal can panic shield, or she can use it in opportunities to get easy
damage back if an enemy telegraphs their attack well such as Snipers.
Passive Ability
Rating: Useful
Having 2 extra HP is a nice little boost as Crystal can take some more
damage before getting killed. There is still plenty of use taking Rhino
Skin at this stage of the game, as having 14 HP gives her a
lot of breathing room for mistakes, something that is seldom
given to other characters. In this situation having healing mutations is
particularly recommended, as playing without any of Bloodlust/Rabbit
Paw/Second Stomach will mean that Crystal will struggle to climb back up
to full health given sparse preloop drops.
Throne Butt Ability
Rating: Somewhat Useful
Crystal's Throne Butt is a bit gimmicky, but can still find its use at
this point of the game. She will sacrifice a bit of her shield time in
order to teleport anywhere on-screen, which could put her out of danger
or directly into it. This is a mutation that requires constant
concentration in order to utilize properly, and can be skipped if that
does not sound appealing.
Summary
Crystal's preloop guide is fairly short as she basically just gives
better defense during the run. Some practice should be put into
shielding efficiently, otherwise gameplay will be very vanilla.
Loop Strategy Guide
Crystal is given the choice between two ultras upon entering loop, which easily propels her from being a good character into one of the best ones.
Fortress
Rating: Meta Defining
Fortress is easily one of the best ultras in the game as Crystal reaches
16 max HP, which is a significant advantage over any other character who
only has 12 HP max. While she is not fully invulnerable and will still
die to sources such as Vans or Laser Crystal contact in one hit, many
other common sources of damage she can shake off. Another perk is that
she doesn't need to take Rhino Skin and can use that mutation slot for
something else (unless if Rhino Skin is the best option, 20 HP is very
good). Any healing mutation is strongly suggested at this point,
especially if running Strong Spirit as trying to heal back up to 16 HP
to recharge Spirit may still be difficult.
If running Fortress then that means Crystal will just have her default shield, this is still a fairly useful tool in loop but should be used carefully. This is most useful during boss fights such as Throne and Throne II, it's more of a risky decision to use when surrounded by dozens of enemies unless if she has a melee weapon ready to swing the moment shield is up.
Juggernaut
Rating: Very Useful
Juggernaut is often overlooked due to how powerful Fortress is, however
this is still a good option in loop. The main downside of a stationary
shield is that if it's mistimed an enemy projectile could hit Crystal
just as the shield wears out, however in Juggernaut's case Crystal will
already be on the move making this unlikely. It also lets her push
towards some enemies to close the gap, such as Big Bandits or Elite
Grunts. Less specific advice applies to this ultra as it's basically up
to player's judgement on how to best use Juggernaut, it provides a lot
of flexibility.
Throne Butt Ability
Rating: Somewhat Useful
Due to the volume of enemies, Crystal's TB is best used in order to
retreat from situations rather than throw her into the middle of the
fray, although it could still support aggressive playstyles for an
otherwise defensive character. This is a niche mutation that may be
useful only to specific players, while others may opt to use the
mutation slot on something they find more useful instead.
Summary
The crux of Crystal's benefits is just that she has better defense,
which lets her respond to situations better. This makes her advice less
specific than other character guides, but still should be overstated
that she is a very great character at this point of the game.
Meta Strategy Guide
Note that this is an advanced guide, it is meant to be used by those primarily looking at loops 3+. This builds off of content shared in the meta guide.
Crystal holds the global world record and is widely considered to be the best character in the game. She is undoubtedly a great character at any point of the game, and is extremely useful for anyone learning meta or wanting to push their personal best as far as possible.
Fortress
Rating: Meta Defining
Fortress is widely considered to be one of the best ultras in the game,
if not the best. Having 16 max HP means that Crystal is able to
shrug off damage in far more situations than other characters and makes
deeploop far more forgiving/easier. This is especially true during boss
fights which are the biggest skill checks in the game, that extra HP can
often make all the difference.
Another reason on why Fortress is so good is because it makes Rhino Skin an optional mutation, which gives the choice of taking either another very good mutation or leaning into 20 HP.
Mutations
| Crystal's P7 | Choose 2 From: | ||||||||||
|
|
|
|
|
|
|
|
|
|
|
|
|
Characters typically take eight 'necessary' mutations and then give the 9th spot to either a healing mutation or Back Muscle. In Crystal's case, she gets to take two of these instead;
- Bloodlust: Very strong healing mutation that lets Crystal push heavily into crowds while being able to ignore lots of damage taken. Also very useful to have at long range while low on health to play it safe, or if trying to recharge Spirit as 15/16 HP is very annoying to recharge otherwise.
- Rabbit Paw: Also furthers Crystal's healing while allowing for SPC damage to be more of a constant, clearing levels and bosses more quickly.
- Back Muscle: Also allows for much more SPC spam and is particularly helpful during boss fights, such as having extra SPC shots prepared for the Throne II fight.
- Rhino Skin: 20 HP means Crystal may run just single heal (or single damage) but even furthers her defensive capabilities. Particularly useful in letting her survive a single IDPD explosion (16 damage), and during Mom fights (10 contact damage) as Crystal would only need to heal once after getting hit to survive a second hit.
- Second Stomach: More useful on Crystal than other characters as it may take her a lot longer to heal up otherwise, but less necessary than the other picks.
Many combinations have been run even in very later loops, the winning combination seems to be Bloodlust + Back Muscle, although other options like 20 HP or Paw + Stomach ('Pawmach') have their strengths as well.
Active Ability
Rating: Very Useful
Crystal's shield still comes in use during many key boss fights.
- Big Bandits: If some Big Bandits have Crystal in their line of sight and are firing while others are trying to charge to close in, shield is a great way to stall for time until the charging ones are close enough to swing at.
- Mom: It's possible to prevent taking contact damage through using shield, although in close quarters Mom still may manage to hit Crystal. Usually very beneficial to use.
- The Throne: If shielding then The Throne can lose track of Crystal causing it to walk forward, even if she's directly nearby. This can be utilized by shielding near the front of the Throne and waiting for it to walk forward (it may choose to walk when cycling between attacks), and SPC can be shot at a diagonal angle to make The Throne walk directly into it. This can be a risky strategy, so practicing on NTT with debug is suggested.
- Throne II: Shield can help conserve rads as it can be used to stall for time during the laser orb attacks. Weapons can also be hotswapped while shielding which lets Crystal do this safely even in later loops.
Juggernaut
Rating: Useful
Because Fortress is one of the best ultras in the game, Juggernaut
simply cannot hold up in comparison. It still can have a few moments to
shine in deeploop, but the winner is clear here. If opting for
Juggernaut will then Crystal will still have an easy time during boss
fights as she can get away from boss attacks without having to spam
Ultra Shovel quite as much, as well as seeing the best usage during the
Throne and Throne II fights.
Throne Butt Ability
Rating: Detrimental
This is a niche mutation that does not have a spot in meta given
Crystal's shield potential, and can actively lead to mistakes.
Summary
Crystal basically just makes the game easier due to extra HP without
heavy strategizing needed, and her shield gives more breathing room at
some important moments. This basically just makes the game more
forgiving and gives far more flexibility in set building; sometimes the
best characters are the simplest ones.